Introduction to the new build system
Microsoft recently made a new build definitions model with the release of Visual Studio 2015 (TFS 2015’s bits are not yet available but this new build service is already available on Visual Studio Online).
Just as a reminder the “old” build models were based on two artifacts:
- The build process template: defined via XAML, it allows you to configure the sequence for the build process.
- The build definition: links together the template, sources and some settings.
This methodology offers a wide range of possibilities to automate your build, packaging, testing and even deployment.
But this comes with a few disadvantages:
- The build process can only be customized via Visual Studio/.NET, this doesn’t go along with Microsoft’s new openness.
- Hard to debug
- Important learning curve
For this reason, Microsoft renamed this methodology “XAML builds” and delivered a new way to build your applications (currently named “build definition” in the interface).
This new methodology has a lot of advantages:
- Easier to understand
- Easier to debug
- Can be edited via the web portal (no need of Visual Studio anymore)
- Provides a lot of third parties integrations (gulp, ant, maven…)
The only drawback being you can only have sequential steps, no complex workflow anymore, here is some documentation: https://msdn.microsoft.com/en-us/Library/vs/alm/Build/overview
Reminders on cloud services
Among the various services offered by Microsoft Azure, you’ll find the cloud services (Paas). As a short recap and from a developer’s point of view, those can be designed from Visual Studio and are made of two types of components:
- Worker role: component meant to do the heavy lifting, similar to a windows service in it’s behavior.
- Web Role: component allowing us to build web applications. However use those only if you have peculiar constraints in terms of deployment/configuration/scalability. Azure web sites (or now azure web apps) cover 98% of what they do and are really simpler to deploy.
If you want more information about it: https://msdn.microsoft.com/en-us/library/azure/jj155995.aspx
Deploying a cloud service from your release pipeline
Now as a conscientious developer, you’d like to deploy this cloud service automatically setting up a release pipeline. To avoid writing a way too long post, I’m not going to enumerate all the advantages a release pipeline brings compared to a manual build and deployment process.
You currently have two ways of setting up the automatic deployment:
- From the cloud service on the current portal (windows.azure.com), there is an option to configure everything for you.
- Set up everything manually
The “issue” with the automatic method is that Azure is going to configure a “XAML” build. It’s OK if you only want to deploy the cloud service, but let’s say you have other items to build/deploy within your solution or that you want to integrate third party tools? In that case it’s going to be very difficult to accommodate XAML builds and these other items (or even impossible in some cases).
I’m going to explain you how to deploy your cloud services automatically with the new build service of Visual Studio Online. This post is going to be based on time I spent searching and on two other ones, one explaining how to manually configure the XAML builds to deploy, another one explaining how to configure the new builds but for azure web sites.
https://msdn.microsoft.com/en-us/Library/vs/alm/Build/azure/index
https://azure.microsoft.com/en-us/documentation/articles/cloud-services-dotnet-continuous-delivery/
I’ll assume you already have created the cloud service and a storage account. (you can also automate that part if you want to do so).
You also have to be the administrator (or co admin) of your subscription on Azure (or ask your admin publish settings file) and administrator of your team project on VSO.
Configuring the service connection to Azure
This first step mainly consists in saying to visual studio online “hey I have an azure subscription other there that you can use to do stuffs”. To do so go to your team’s project main page and click on the gear (top right corner).
Click on the services tab then on add a new service connection.

Add the subscription id, name and certificate that you can find from the publish settings file. You can get this file multiple ways:
- Clicking on the blue link bottom right corner
- From the Azure powershell console
- Asking you azure administrator (if you have one)
Here is a video that explains how to configure these settings.
Note: for this step I had no issues with my personal live account but it seems that if your azure subscription is under an enterprise agreement and if you’re logged in using a corporate account, you might have troubles. To workaround this issue at Negotium we configured a deployment from the azure portal which added the service connection at the same time.
Adding the publishing step
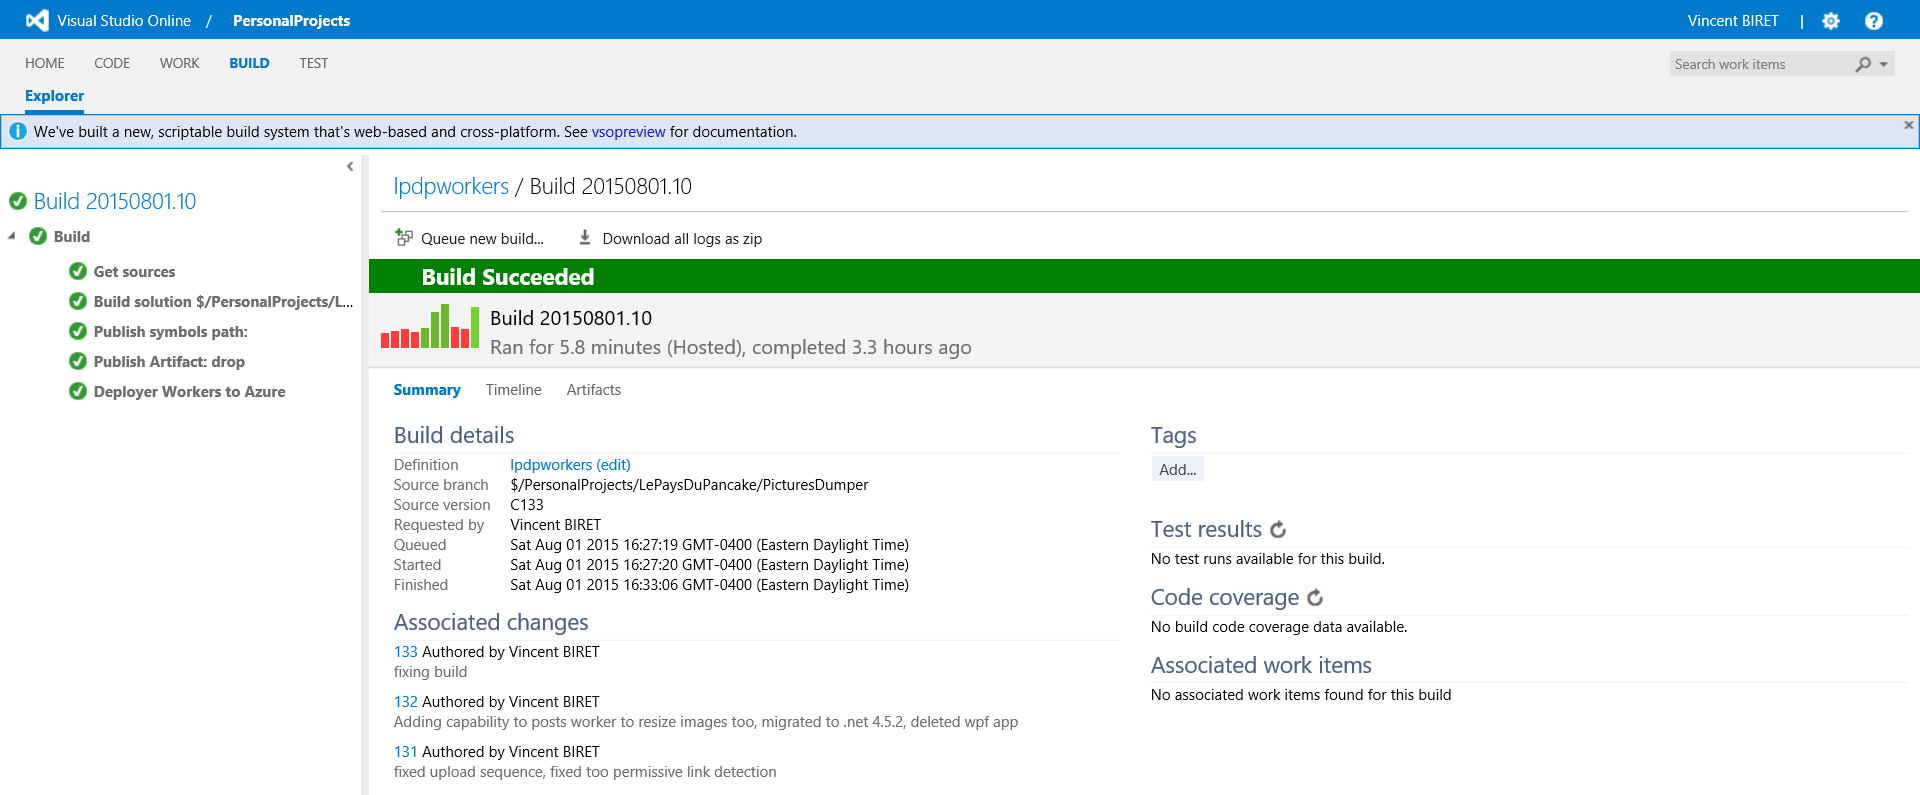
Let’s go to the “build” tab of your team’s project, you should already have created a new build definition of type “visual studio”. By default 4 steps are configured:
- Visual Studio Build: actually builds the code
- Visual Studio Test: for those familiar, mstest
- Index and Publish sources: creates debug symbols and packages these.
- Publish build artifacts: brings back the ouput of the process and archives it with the build
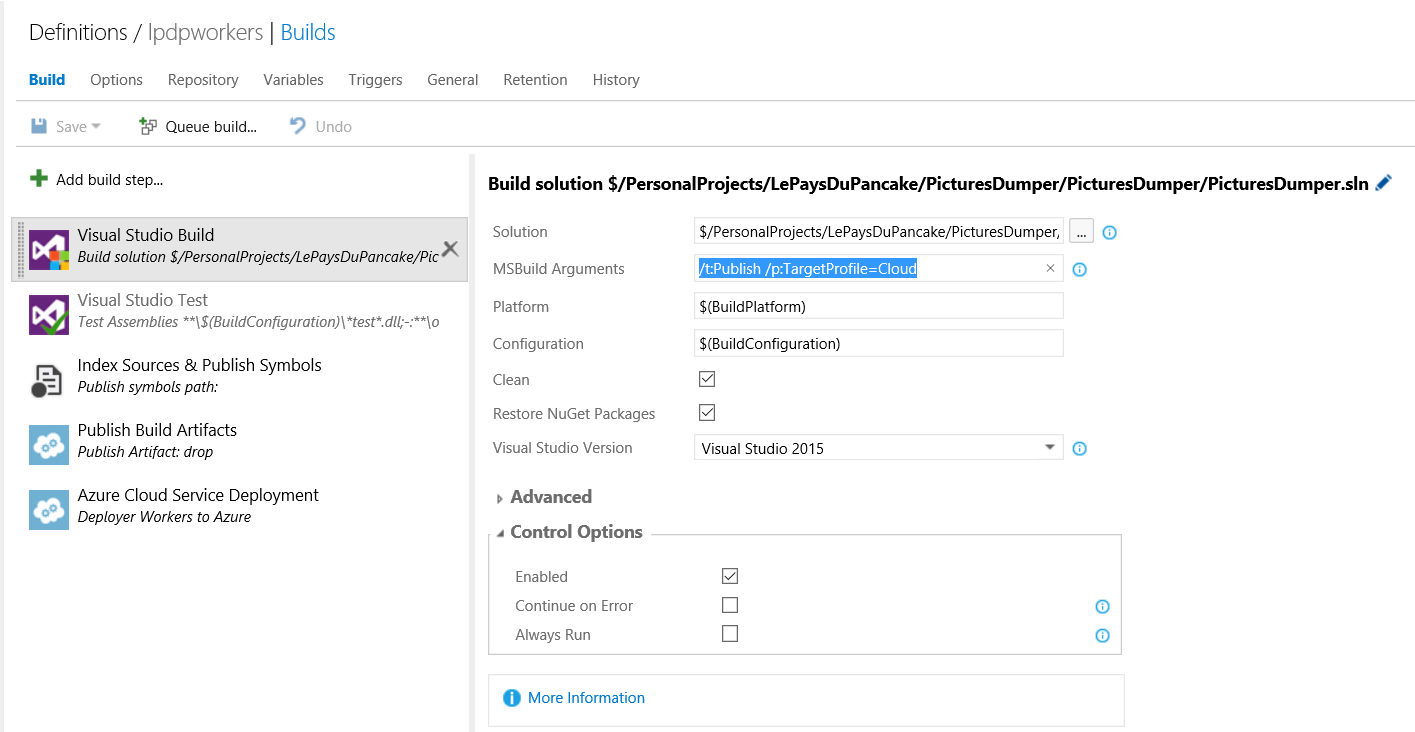
We’ll begin by editing the first step to add these arguments to the msbuild process « /t:Publish /p:TargetProfile=Cloud ». “cloud” must be the name of one of my cloud service publishing profiles (by default cloud and local).
This will instruct msbuild to make publishing packages after building.
That being done, we’ll add a last 5th step to our build process of type azure cloud service deployment.
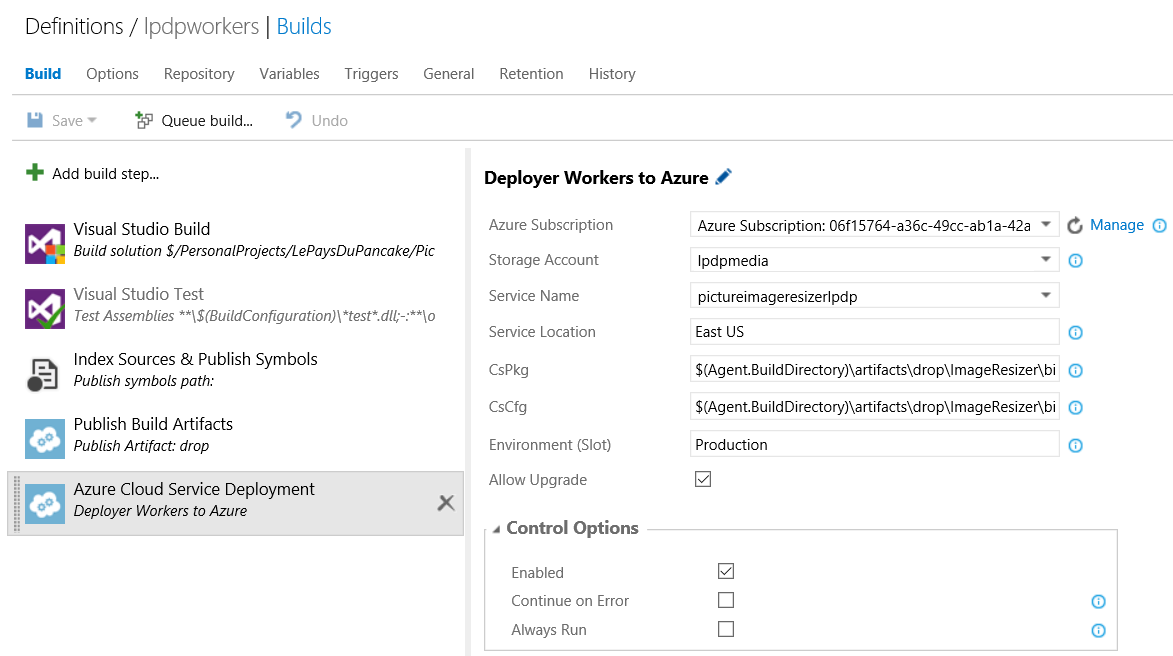
Select the subscription you just added, add the storage account name you want to use for the deployment and the cloud service name.
For the cscfg and cspkg you have two different options, either you can specify a relative or full path or you can specify a powershell search pattern. Preferring precision I set:
$(Agent.BuildDirectory)\artifacts\drop\ImageResizer\bin$(BuildConfiguration)\app.publish\ImageResizer.cspkg
$(Agent.BuildDirectory)\artifacts\drop\ImageResizer\bin$(BuildConfiguration)\app.publish\ServiceConfiguration.Cloud.cscfg
“imageResizer” being the name of my cloud service project.
(if you’re not sure of the files/folers names just build once and have a look to the drop’s content)
Don’t forget to enable this step and you’re all set!